It’s rare that anyone uses the option to remotely connect to a PC, but there are some incredibly useful things you can do with a remote connection. I’ve personally used remote connections for everything from controlling my computer’s volume with my phone to repairing my parents computer from long distance.
It sounds like a massive security risk to open your computer to allow someone to remotely connect, but it’s not if done properly. In this article, I’ll walk you through not only how to remotely connect to your PC, but also how to do so with your security in mind.
There’s quite a few different ways to do it, but today we’ll just be looking at the easiest and most common method.
Step 1: Enable Remote Connection
Windows has a built in ability to allow computers to remotely connect. If the capabilities of Windows Remote Desktop suite your purposes, it’s easily the simplest and most readily available option you have.
The grammar used here can get a little confusing, so let’s create some terminology before we continue forward. Remote access inherently requires two devices. There’s the device being controlled and the device doing the controlling.
From here on out, the device you want to control remotely will be called “Device A.” Meanwhile, the device you want to use to do the remote controlling will be called “Device B.”
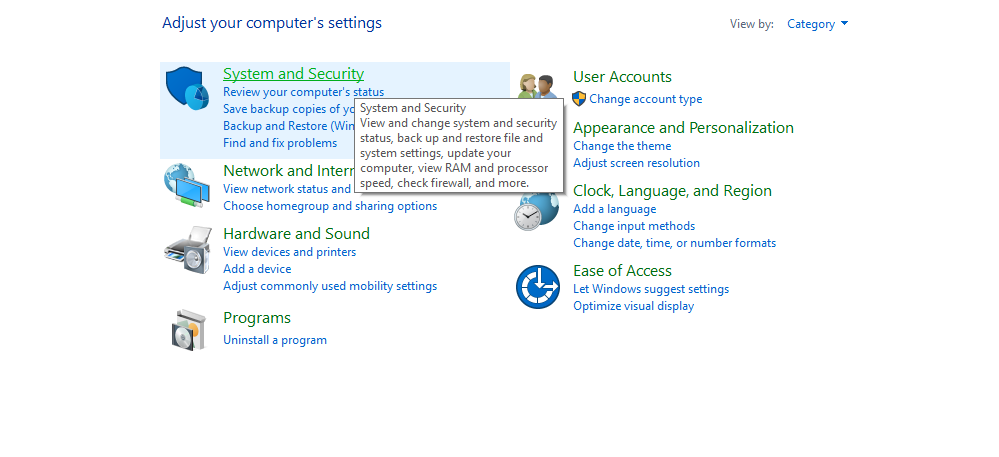
To use Windows Remote Desktop, you need to enable it on Device A. From the Start Menu, go to Control Panel > System and Security > System. On the left, you should see an option that says “Remote settings.” Click this, and it will open up a menu in a new window.
On the first tab of this menu, make sure “Allow Remote Assistance connections to this computer,” is checked on. From here, you can also adjust the advanced settings which will let you control other aspects of how the remotely controlled access will work.
Step 2: Add Users
This step may be option depending on the system you’re using, but if your computer has the option to add users then you should definitely use it. Adding users who are allowed to remotely connect to your computer will allow you to rest easy in your system’s security.
You add users from the same tab on the Remote settings menu we were just on. Simply select or type in the name of users from your network you wish to allow remote connection
Step 3: Find Device A’s System Name

You’re not finished with Device A just yet. In order for Device B to connect to Device A, you’ll need to know Device A’s system name. Fortunately, it’s easy to find this. In fact, we’ve already been to the menu before.
Go back to Control Panel > System and Security > System. You can find your computer’s name about halfway down this page. It will be labeled as just that: Computer Name.
Step 4: Disable Sleep Mode on Device A
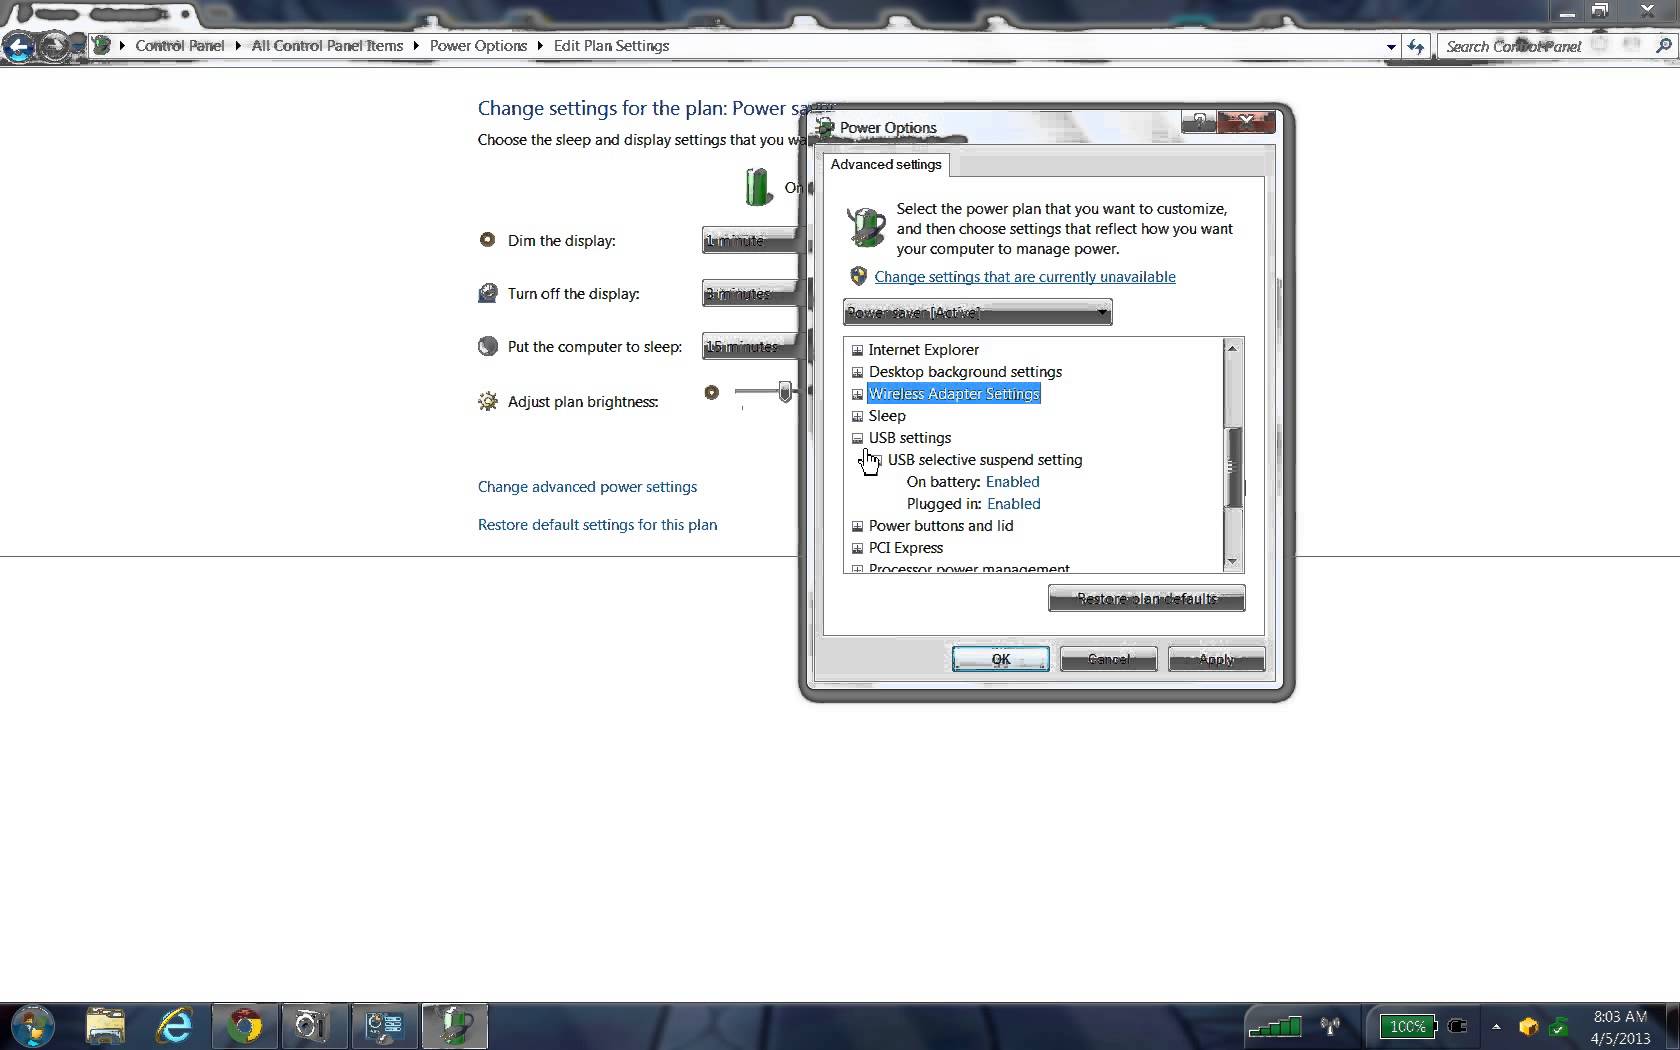
The way remote connection works, it’s impossible to establish a connection with a computer that’s in hibernation, sleep, or any other shutdown state. If you’d like to access the computer any time, make sure you disable sleep/hibernation modes.
To do this, go back to Control Panel > System and Security and select “Power Options.” Find the power plan that your computer is currently using, then click the option for “Change plan settings” next to it. From here, click “Change advanced power settings.” Find the options for sleep and hibernation and make sure they’re both set to “never.”
Step 5: Open The Appropriate Ports
If both Device A and Device B are connected to the same network, you’re ready to go and can continue on to Step 6. If you’re looking to remotely access Device A through the internet, you’ll need to establish that first.
You’ll need to open port 3389 on Device A before you can remotely connect through the internet. If you’ve never opened a port before, check out our guide on doing so here.
Opening this port will allow anyone to try to remotely connect to your computer, so take some precautions. First, make sure you have a strong Windows login password. Secondly, it’s a good idea to close this port again once you’re done with your remote connection adventure.
Step 6: Establish Connection From Device B
Now Device A is set up and we’re ready to move on to Device B. From the Start Menu on Device B, simply type in “remote desktop connection.” This will pull up a menu where you can type in the computer name and, if necessary, the username of the device you’d like to connect to, which is Device A in this case.
Before you begin, you can also check out the options menu to adjust the settings to suite your connection. Once you’re ready, click “Connect.” Once the connection is made, Device A’s monitor should appear as a window on Device B, and you can begin controlling that computer remotely. Enjoy!
Optional: Connect to Device A Through a Mobile Device
It’s also possible, and in fact very easy, to remotely connect to Device A through a smartphone or tablet. Just download the official Microsoft Remote Desktop app, which works for both iOS and Android. Make sure it’s the app from Microsoft Corporation, in order to make sure it’s official.
As long as remote access is set up right on Device A, it should be a breeze to use the app to connect through your mobile device.
In Short
Whether for pleasure or business, remote access has a ton of applications which the average PC user isn’t using. This article shows you how simple and secure the process can be, now it’s up to you to find all the different ways you can use it.